Collection
Home Training
2026.10.01
Resistant Bands: Changing the Direction Changes the Workout
Choosing Resistance and Fixing Style with Loop, Tube, and Handle Types
Resistance bands may fold small, but the nature of the workout can change greatly depending on their length, cross-section, grips, and fixing methods. Long loops are suitable for assisted pull-ups and full-body resistance, while short loops are perfect for activating the areas around the hips and knees, and tubes are ideal for pulling exercises using handles and door anchors. Just judging resistance by color can lead to discrepancies as standards vary by brand.
This list compiles seven types of loop, tube, and handle systems that are actually sold. It compares whether to purchase a single resistance level or multiple strengths, whether to use them barehanded or with handles, and how to fix them to a door or post. Check the official information for latex content, length, and strength range, and replace the band immediately if there are any cracks or stickiness on the surface.
This list compiles seven types of loop, tube, and handle systems that are actually sold. It compares whether to purchase a single resistance level or multiple strengths, whether to use them barehanded or with handles, and how to fix them to a door or post. Check the official information for latex content, length, and strength range, and replace the band immediately if there are any cracks or stickiness on the surface.
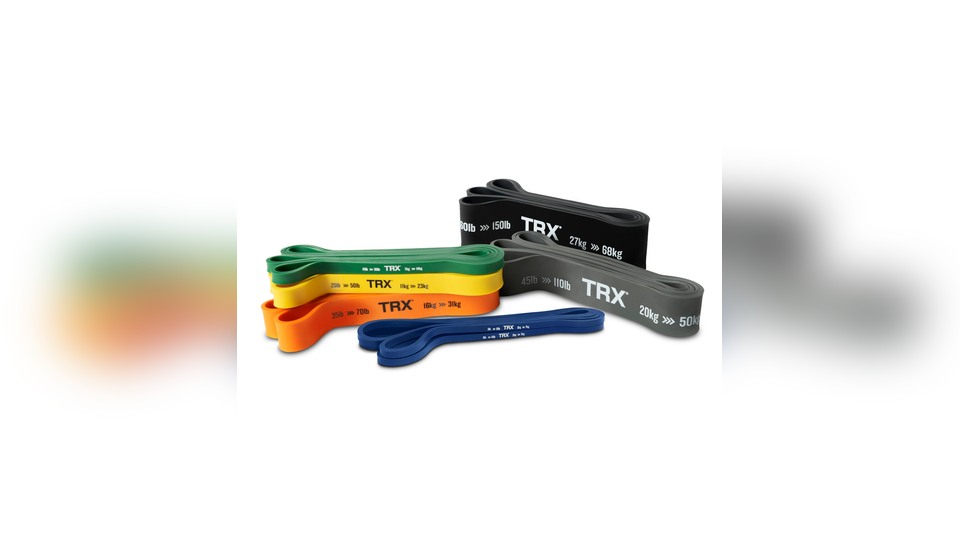
TRX Strength Bands
A long-loop type band available in various colors and resistance levels, suitable for full-body strength and assisted pull-ups. The product consists of ‘long closed-loop and color-coded resistance levels’. It provides low-impact elastic resistance in a portable size. The main use is for ‘assisted pull-ups and full-body resistance workouts’, making it easy to see how it differs from other products.
Start by hooking it to your feet or a stable anchor point and gradually increasing the tension. Before purchasing, check ‘strength by color, latex content, and surface damage’. Replace any band that shows cracks or stickiness for safety and avoid sudden snapping towards your face.
Start by hooking it to your feet or a stable anchor point and gradually increasing the tension. Before purchasing, check ‘strength by color, latex content, and surface damage’. Replace any band that shows cracks or stickiness for safety and avoid sudden snapping towards your face.
구성·형태 긴 폐쇄형 루프·단계별 색상
잘 맞는 용도 보조 풀업과 전신 저항 운동
핵심 특징 충격이 적은 탄성 저항을 이동 가능한 크기로 제공한다
사용 방식 발이나 안정된 고정점에 걸고 장력을 천천히 높인다
확인할 점 색상별 강도·라텍스 함유·표면 손상
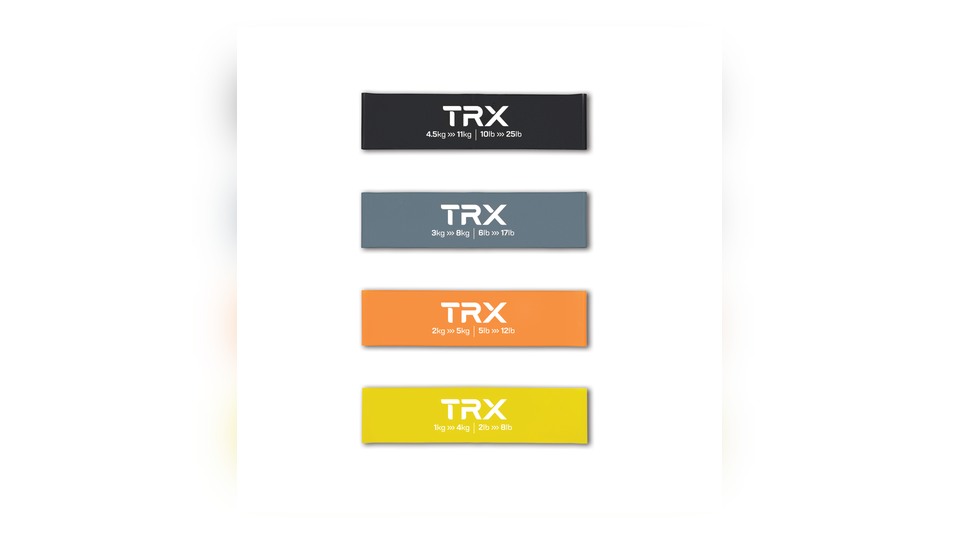
TRX Exercise Bands
A set of small loop bands used for lower body activation and short range of motion exercises. If your goal is ‘glute, hip, and warm-up work’, this is worth considering. It is summarized as ‘short loops and multiple resistances’. As a result, it adds lateral resistance when hooked just above the knees or at the ankles. It’s particularly effective for ‘glute, hip, and warm-up exercises’.
Follow this stable usage sequence: open the band slowly within the range of your joints without collapsing inwards. In selection steps, don't overlook ‘loop length, strength composition, and twisting issues’. Also, replace any band showing cracks or stickiness, and avoid a sudden snap towards your face.
Follow this stable usage sequence: open the band slowly within the range of your joints without collapsing inwards. In selection steps, don't overlook ‘loop length, strength composition, and twisting issues’. Also, replace any band showing cracks or stickiness, and avoid a sudden snap towards your face.
구성·형태 짧은 루프·복수 강도
잘 맞는 용도 둔근·고관절·워밍업
핵심 특징 무릎 위나 발목에 걸어 측면 저항을 더한다
사용 방식 관절이 안쪽으로 무너지지 않는 범위에서 천천히 벌린다
확인할 점 루프 길이·강도 구성·말림 현상
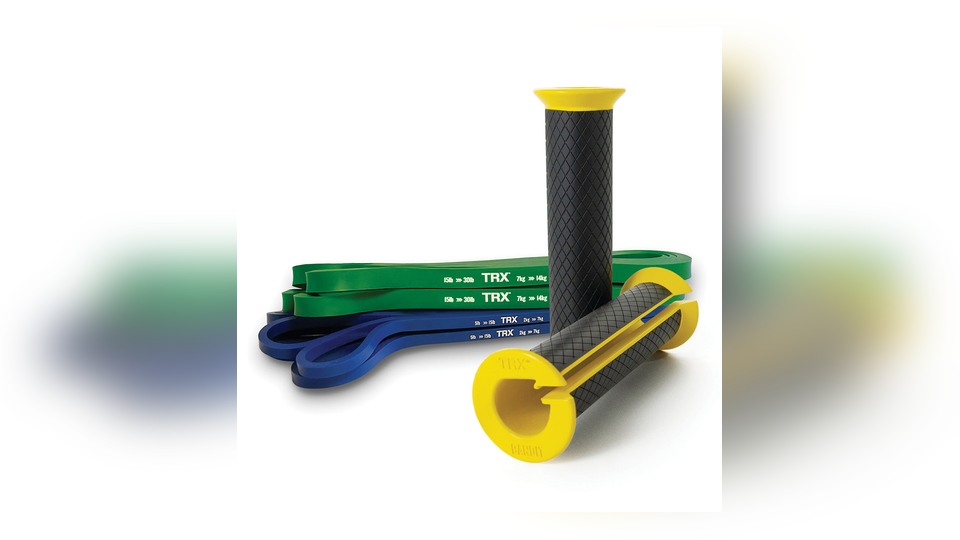
TRX Bandit
A handle system that holds resistance bands in its handles to reduce pressure on the palms and keep the band from rolling. Instead of gripping the band directly with your hands, you connect it to rotating grips. Broken down, its structure is ‘2 detachable handles and band-mounting grooves’. For routines centered on ‘upper-body presses and rows’, this design becomes the standard for judging its strengths and limits.
When you actually take it out to use, seat the band precisely in the groove and check that it's locked. Before ordering, compare the details on ‘whether bands are included, compatible widths, and how the handles lock’ to cut down on unexpected inconveniences. During workouts, replace any band that has cracked or turned sticky, and avoid directions where it could suddenly snap toward your face.
When you actually take it out to use, seat the band precisely in the groove and check that it's locked. Before ordering, compare the details on ‘whether bands are included, compatible widths, and how the handles lock’ to cut down on unexpected inconveniences. During workouts, replace any band that has cracked or turned sticky, and avoid directions where it could suddenly snap toward your face.
구성·형태 탈착 손잡이 2개·밴드 결합 홈
잘 맞는 용도 상체 프레스와 로우 동작
핵심 특징 밴드를 손으로 직접 움켜쥐지 않고 회전 가능한 그립에 연결한다
사용 방식 밴드를 홈에 정확히 끼우고 잠금 상태를 확인한다
확인할 점 밴드 포함 구성·호환 폭·손잡이 고정
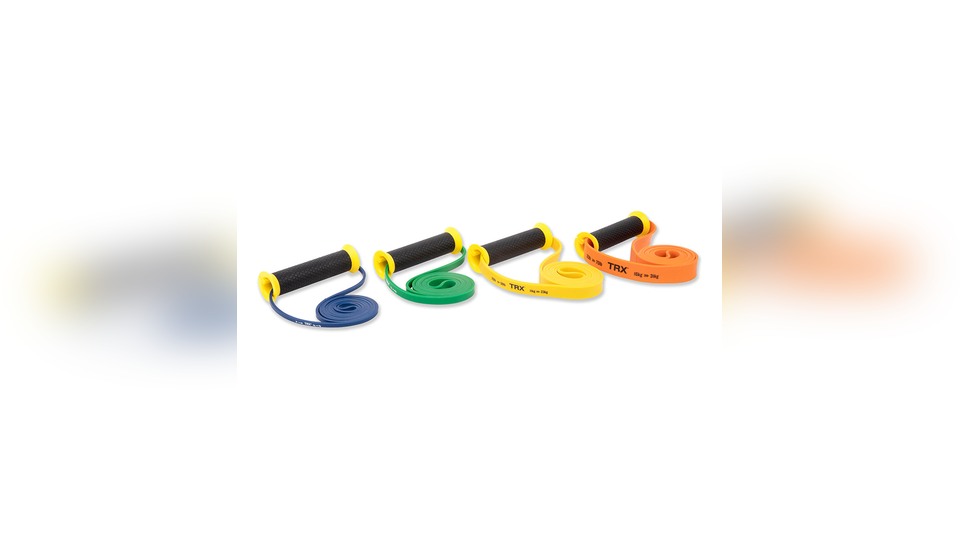
TRX Bandit Pro Kit
This kit consists of Bandit handles and multiple resistance bands, making it easy to switch between intensities. Key features include ‘four detachable handles and multiple loop bands’. The actual operating characteristics are as follows: it allows for distinguishing between upper and lower body workout intensities by changing the bands. Recommended use is for ‘handle-based full-body band routines’.
When setting up, check that the handles are fully attached to the slots with the bands. Review ‘band stages included, number of handles, and compatible components’ on the product page to ensure all parts are suitable. Before repeated use, replace any band showing cracks or stickiness and avoid a sudden snap towards your face.
When setting up, check that the handles are fully attached to the slots with the bands. Review ‘band stages included, number of handles, and compatible components’ on the product page to ensure all parts are suitable. Before repeated use, replace any band showing cracks or stickiness and avoid a sudden snap towards your face.
구성·형태 탈착 손잡이 4개·복수 루프 밴드
잘 맞는 용도 손잡이형 전신 밴드 루틴
핵심 특징 밴드를 교체해 상체와 하체 운동 강도를 구분한다
사용 방식 손잡이 슬롯과 밴드가 완전히 결합됐는지 확인한다
확인할 점 포함 밴드 단계·손잡이 수·호환 부품
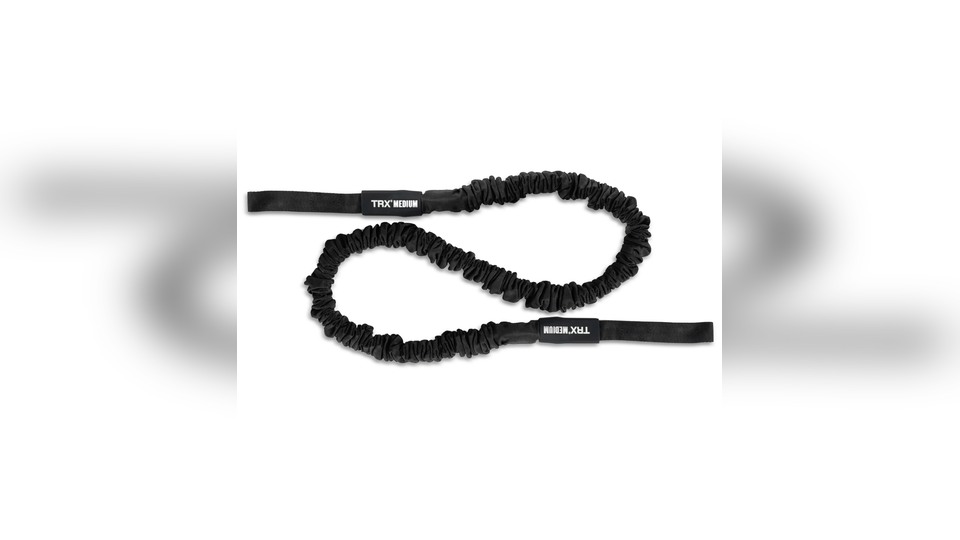
TRX Rip Training Resistance Cord
A replaceable resistance cord used for rotational and pulling exercises with the TRX Rip Trainer. Its use is clear in routines centered around ‘Rip Trainer strength adjustment and rotational movements’. The basic composition is ‘elastic cord and carabiner attachment’. This structure leads to the following functions: it changes the resistance level of the existing bar system through cord replacement. The applicable range is close to ‘Rip Trainer strength adjustment and rotational movements’.
The recommended initial approach is as follows: lock the carabiner to the specified anchor point and check for wear. Next, confirm whether you need the Rip Trainer, the strength color, and the connection points, to assess if it fits your environment. The basic safety principle is as follows: replace any band showing cracks or stickiness and avoid a sudden snap towards your face.
The recommended initial approach is as follows: lock the carabiner to the specified anchor point and check for wear. Next, confirm whether you need the Rip Trainer, the strength color, and the connection points, to assess if it fits your environment. The basic safety principle is as follows: replace any band showing cracks or stickiness and avoid a sudden snap towards your face.
구성·형태 탄성 코드·카라비너 연결부
잘 맞는 용도 Rip Trainer 강도 조절과 회전 운동
핵심 특징 기존 바 시스템의 저항 수준을 코드 교체로 바꾼다
사용 방식 카라비너를 지정 고정점에 잠그고 마모를 확인한다
확인할 점 Rip Trainer 필요 여부·강도 색상·연결부
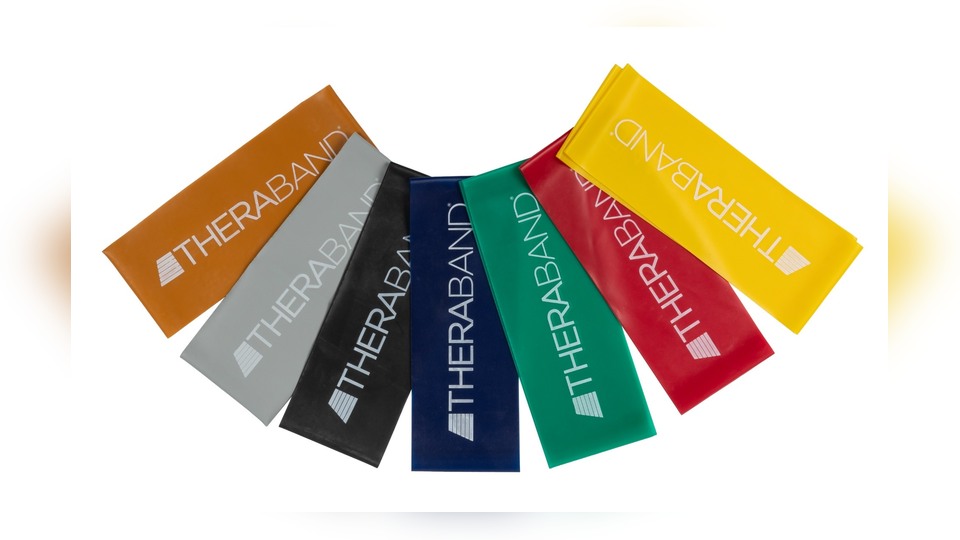
THERABAND Professional Resistance Band Loops
A resistance band in the form of small continuous loops, color-coded by level. You can put it on right away without tying any knots and perform consistent repeated movements. It adopts a ‘continuous loops and resistance by color’ setup to make the following difference. If your workout goal is closer to ‘rehab support and lower-body activation’, compare it together with the numerical specs.
Before use, go through the following step. Start with a small range of motion and keep your joints aligned. The key items for a purchase decision are ‘circumference, resistance level, and whether it contains latex’. Above all, replace any band that has cracked or turned sticky, and avoid directions where it could suddenly snap toward your face.
Before use, go through the following step. Start with a small range of motion and keep your joints aligned. The key items for a purchase decision are ‘circumference, resistance level, and whether it contains latex’. Above all, replace any band that has cracked or turned sticky, and avoid directions where it could suddenly snap toward your face.
구성·형태 연속 루프·색상별 저항
잘 맞는 용도 재활 보조와 하체 활성화
핵심 특징 매듭 없이 바로 착용해 일정한 반복 동작을 만들 수 있다
사용 방식 운동 범위를 작게 시작해 관절 정렬을 유지한다
확인할 점 둘레 크기·저항 단계·라텍스 포함
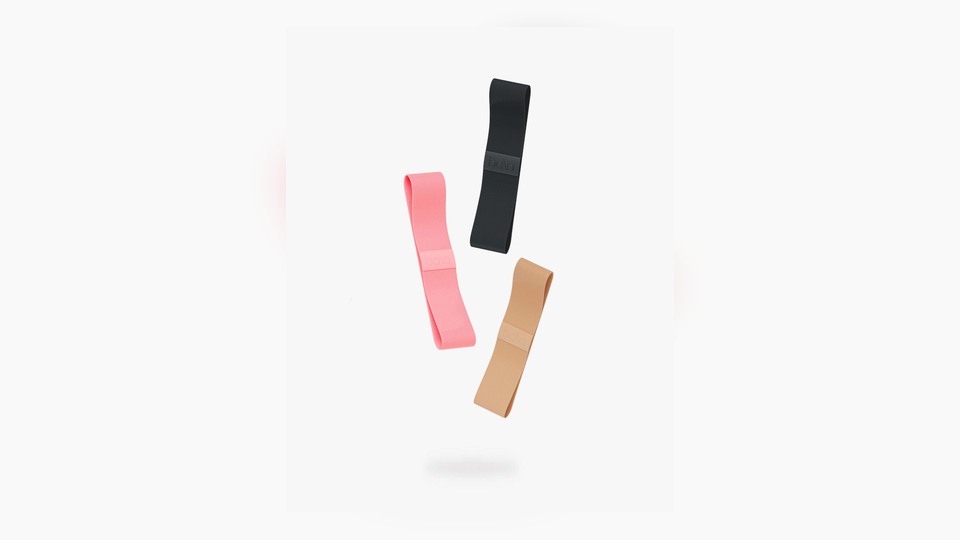
Bala Bands
A set of bands for lower body exercises made from a combination of fabric materials and internal elastic structures. The main application range is for ‘glute and leg-centered home training’. The components include ‘fabric loops and multiple strengths’, and the actual features are as follows: the wide width reduces skin bunching and makes it easy to differentiate between strength routines. Prior to using it for ‘glute and leg-centered home training’, it’s advisable to consider the storage position and preparation routes together.
In the preparation stage, place it flat on your thighs or above your knees and perform lateral movements. Then check the ‘set intensity, washing method, and damage to the stretch part’ and plan for maintenance. Before each workout, replace any band showing cracks or stickiness and avoid a sudden snap towards your face.
In the preparation stage, place it flat on your thighs or above your knees and perform lateral movements. Then check the ‘set intensity, washing method, and damage to the stretch part’ and plan for maintenance. Before each workout, replace any band showing cracks or stickiness and avoid a sudden snap towards your face.
구성·형태 직물 루프·복수 강도
잘 맞는 용도 둔근과 다리 중심 홈트레이닝
핵심 특징 넓은 폭이 피부 말림을 줄이며 강도별 루틴을 나누기 쉽다
사용 방식 무릎 위 또는 허벅지에 평평하게 놓고 측면 동작을 한다
확인할 점 세트 강도·세탁 방법·신축부 손상
For assisted pull-ups and large compound movements, long loops are simpler, while short loops work well for side steps and glute exercises. If you want to reduce palm pressure and create varied upper body pulling motions, handle or tube sets are convenient. Rather than going for the strongest band from the start, preparing two or three resistance levels that allow you to maintain proper posture can help widen your workout range easily.
Before use, stretch the entire band to check for tears and discoloration, and avoid placing it directly on sharp edges or rough surfaces. When fixing it to a door, make sure the door closes in the opposite direction of your body and check the position of the anchor. In pulling motions towards your face, particularly test the fixing points, and after exercising, don’t leave it stretched out; store it loosely away from sunlight and heat.
Before use, stretch the entire band to check for tears and discoloration, and avoid placing it directly on sharp edges or rough surfaces. When fixing it to a door, make sure the door closes in the opposite direction of your body and check the position of the anchor. In pulling motions towards your face, particularly test the fixing points, and after exercising, don’t leave it stretched out; store it loosely away from sunlight and heat.
At a glance
7 items
TRX Strength Bands
긴 폐쇄형 루프·단계별 색상보조 풀업과 전신 저항 운동
TRX Exercise Bands
짧은 루프·복수 강도둔근·고관절·워밍업
TRX Bandit
상체 프레스와 로우 동작
TRX Bandit Pro Kit
손잡이형 전신 밴드 루틴
TRX Rip Training Resistance Cord
탄성 코드·카라비너 연결부
THERABAND Professional Resistance Band Loops
연속 루프·색상별 저항재활 보조와 하체 활성화
Bala Bands
직물 루프·복수 강도둔근과 다리 중심 홈트레이닝
As part of the Coupang Partners program, this post may earn a commission from qualifying purchases.
Comments 0
Log in to leave a comment.
Be the first to comment.
How about these lists?


You might also like


🎲
Not ready to stop here?
Wondering what to read next is the biggest waste of time.
Let the dice decide — you won't know what pops up until you roll.
If you don't press it… won't you wonder forever? 👀